Installing the RATMO® is a straightforward process, guided by our user-friendly RATMO® Smart Trap Guide. It’s designed as a plug-and-play solution, ensuring ease of installation.
Get access to the Smart City App
The APP is designed for 2 different operating systems, iPhone and Android.
IPHONE: Download the App from Apples APP Store. Search for Arctic Smart City. Download the App.
ANDROID: Download the App from Google Play Store. Search for Arctic Smart City. Download the App.
Get your log-on details from Arctic Systems.
Get access to the Web Terminal
To access the Smart City Web Terminal and get real-time access to your traps, get your log-on details from Arctic Systems.
Download our RATMO guide or our RATMO Quick Start Guide
STEP 1 GET THE RATMO® READY
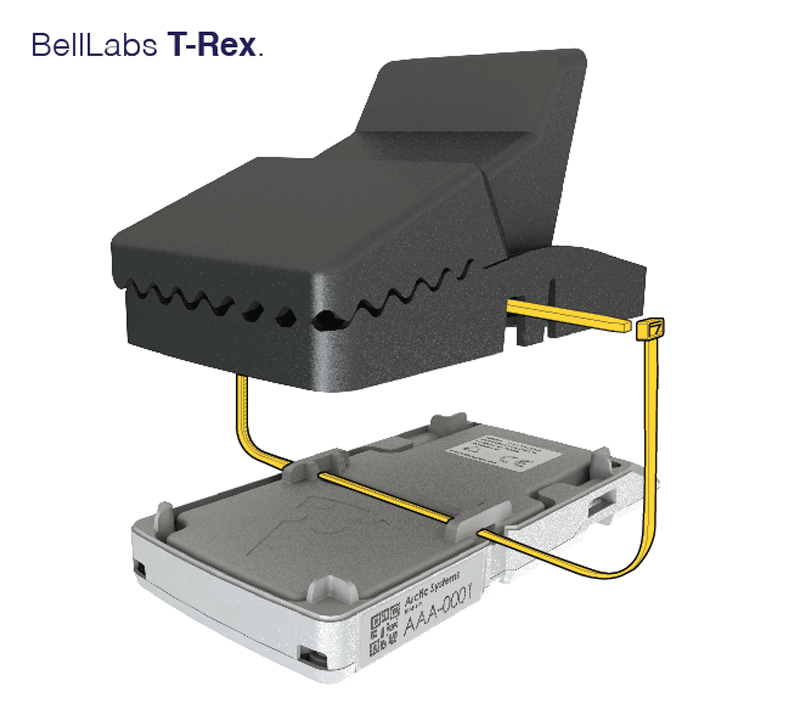
The initial step involves attaching the RATMO® device to your chosen trap. The RATMO® can be seamlessly integrated with the BELL T-Rex trap as well as other brands available in the market. In the provided illustration, you can see that the BELL T-Rex trap is easily prepared for attachment to the RATMO®, creating a highly durable and resilient mounting that can withstand significant wear and tear.
STEP 2 BAIT AS NORMAL
While holding the trap open, proceed to bait it as you typically would, using the specific bait chosen for the particular site.

STEP 3 SCAN AND RECORD LOCATION
Simply scan the distinct QR code on the trap using the Arctic System App. This action prompts quick entry of location details into the system. Before the site visit, the client’s setup is arranged either through the App or the web terminal.
The straightforward wizard captures multiple vital details, including the type of bait employed, and allows for the inclusion of up to 3 images to document the location for future reference.

STEP 4 ARM
Once all the necessary details have been entered and saved, the trap can be armed using the activation key. This action triggers a sequence: the trap establishes contact with the backend, accompanied by a visible and audible arming sequence alarm, after which it transitions into monitoring mode.
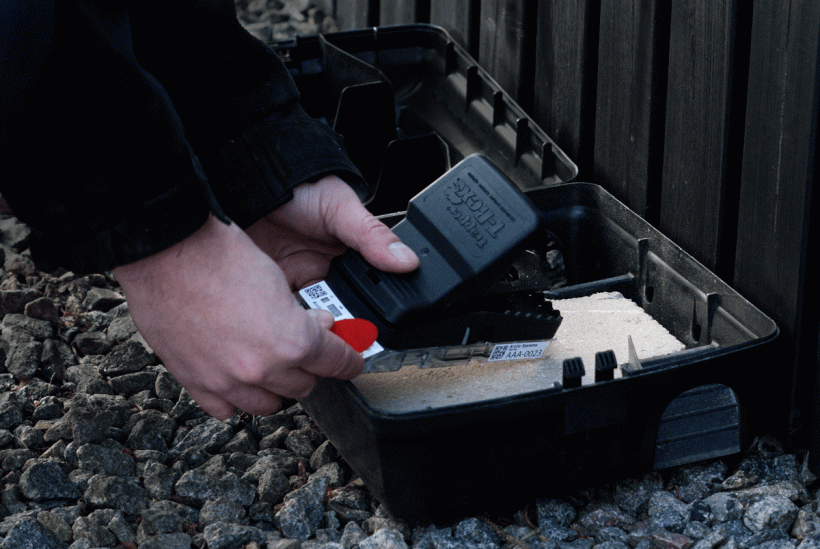
In scenarios where the RATMO® is placed within an RBS (rodent bait station), the box is closed before the extended tone. At this point, the trap is configured to monitor the area for any captured rodents.
STEP 5 MONITOR
On-site trap monitoring can be effortlessly conducted through the Arctic Systems App by accessing the Clients List, which offers various viewing choices.
1.The list provides an overview of all Clients and Locations. Clients can be designated as VIP status for sites necessitating immediate attention, such as shops and restaurants.

2. Additionally, the Map View option allows you to switch to a visual representation, providing an overview of areas that require heightened attention.

STEP 6 REGISTER A VISIT
Upon receiving a notification to visit a site, it’s time to examine the data captured by the RATMO®.
Next, scan the trap once more and utilize the wizard to input the specifics of the captured rodent.
All registered site visits are compiled into a monthly audit report, furnishing statistics for the respective location.
Following completion of the registration, the trap is baited, re-armed in the usual manner, and the monitoring persists.
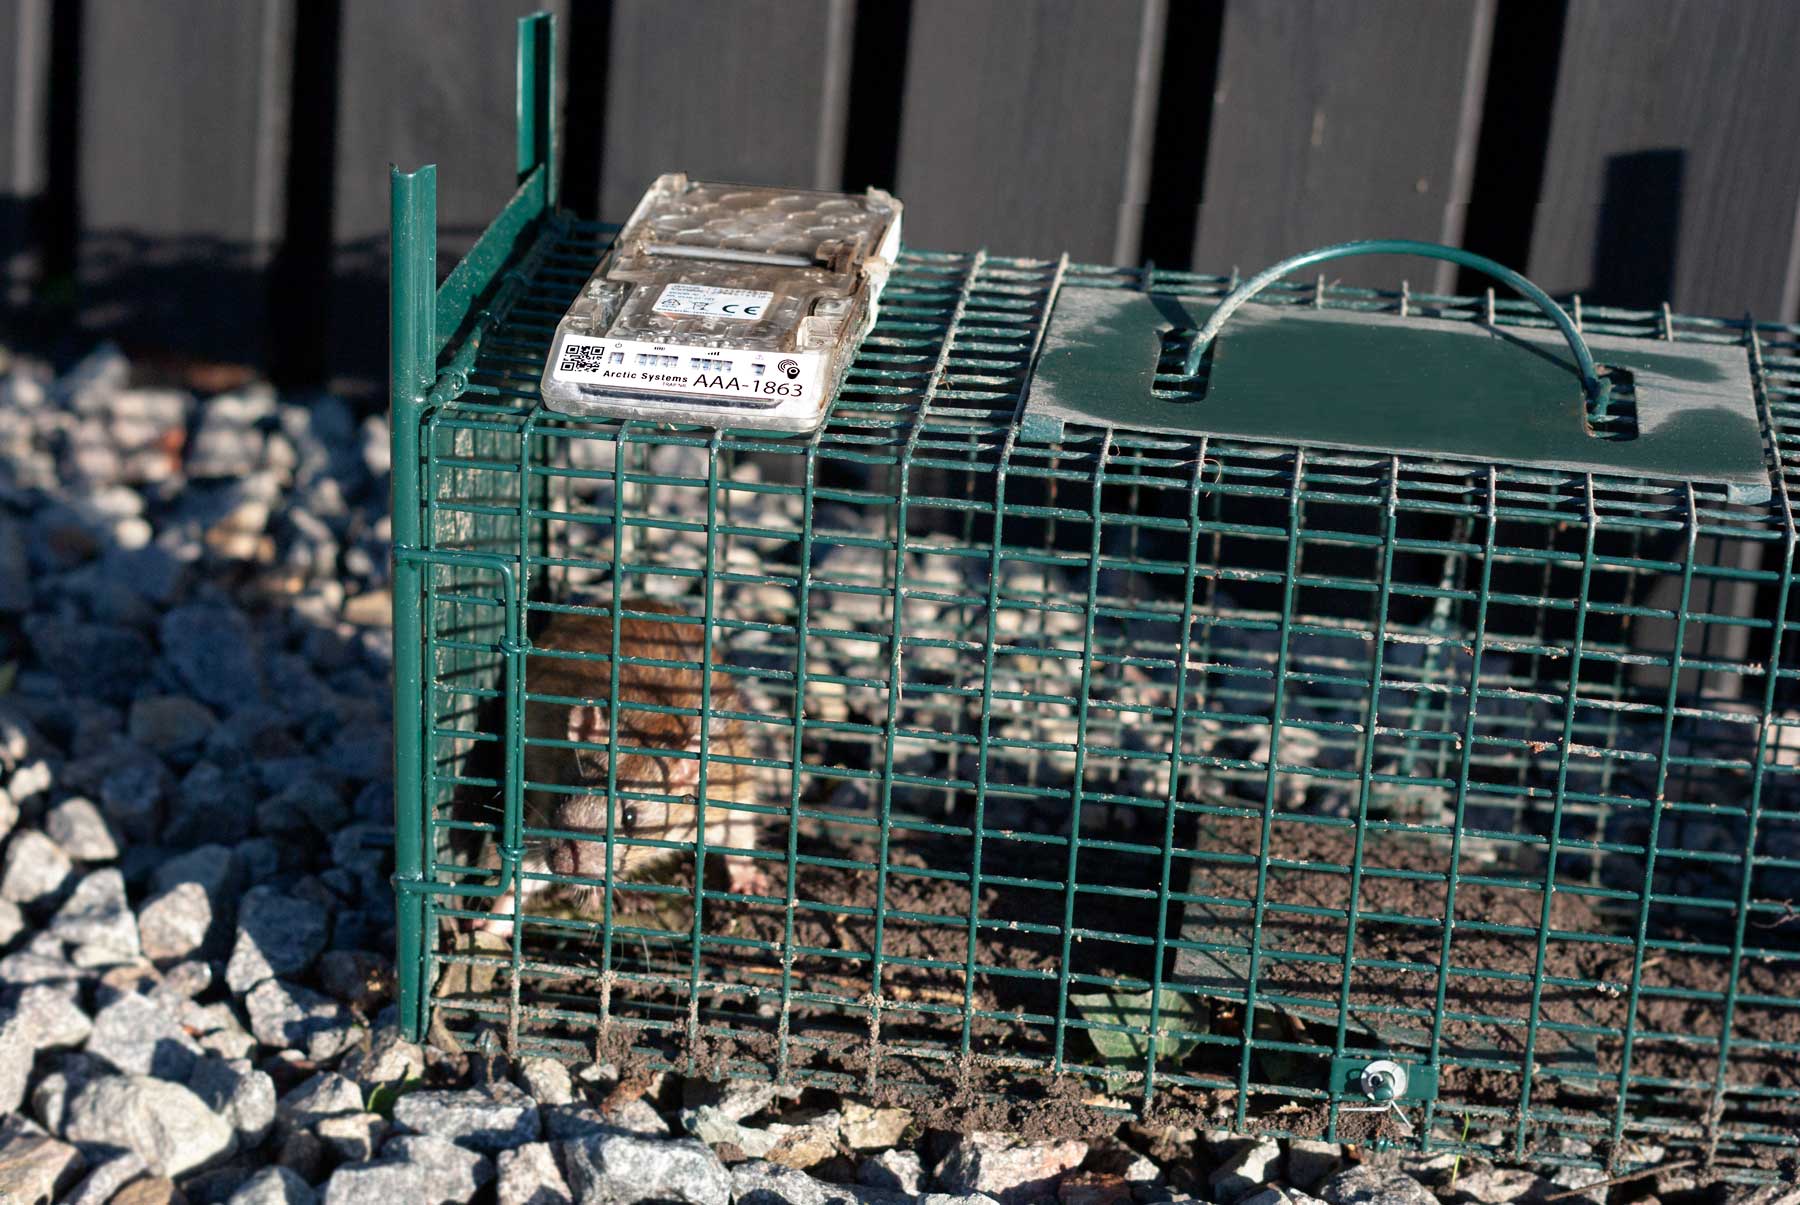
LARGER RODENTS
For animals like squirrels and raccoons, our RATMO® device can be affixed to larger cage-type traps designed for live capture. Mounting the RATMO® is as straightforward as using cable ties to secure it to the trap door. The device will then detect and record the sound of the door closing, facilitating efficient monitoring.
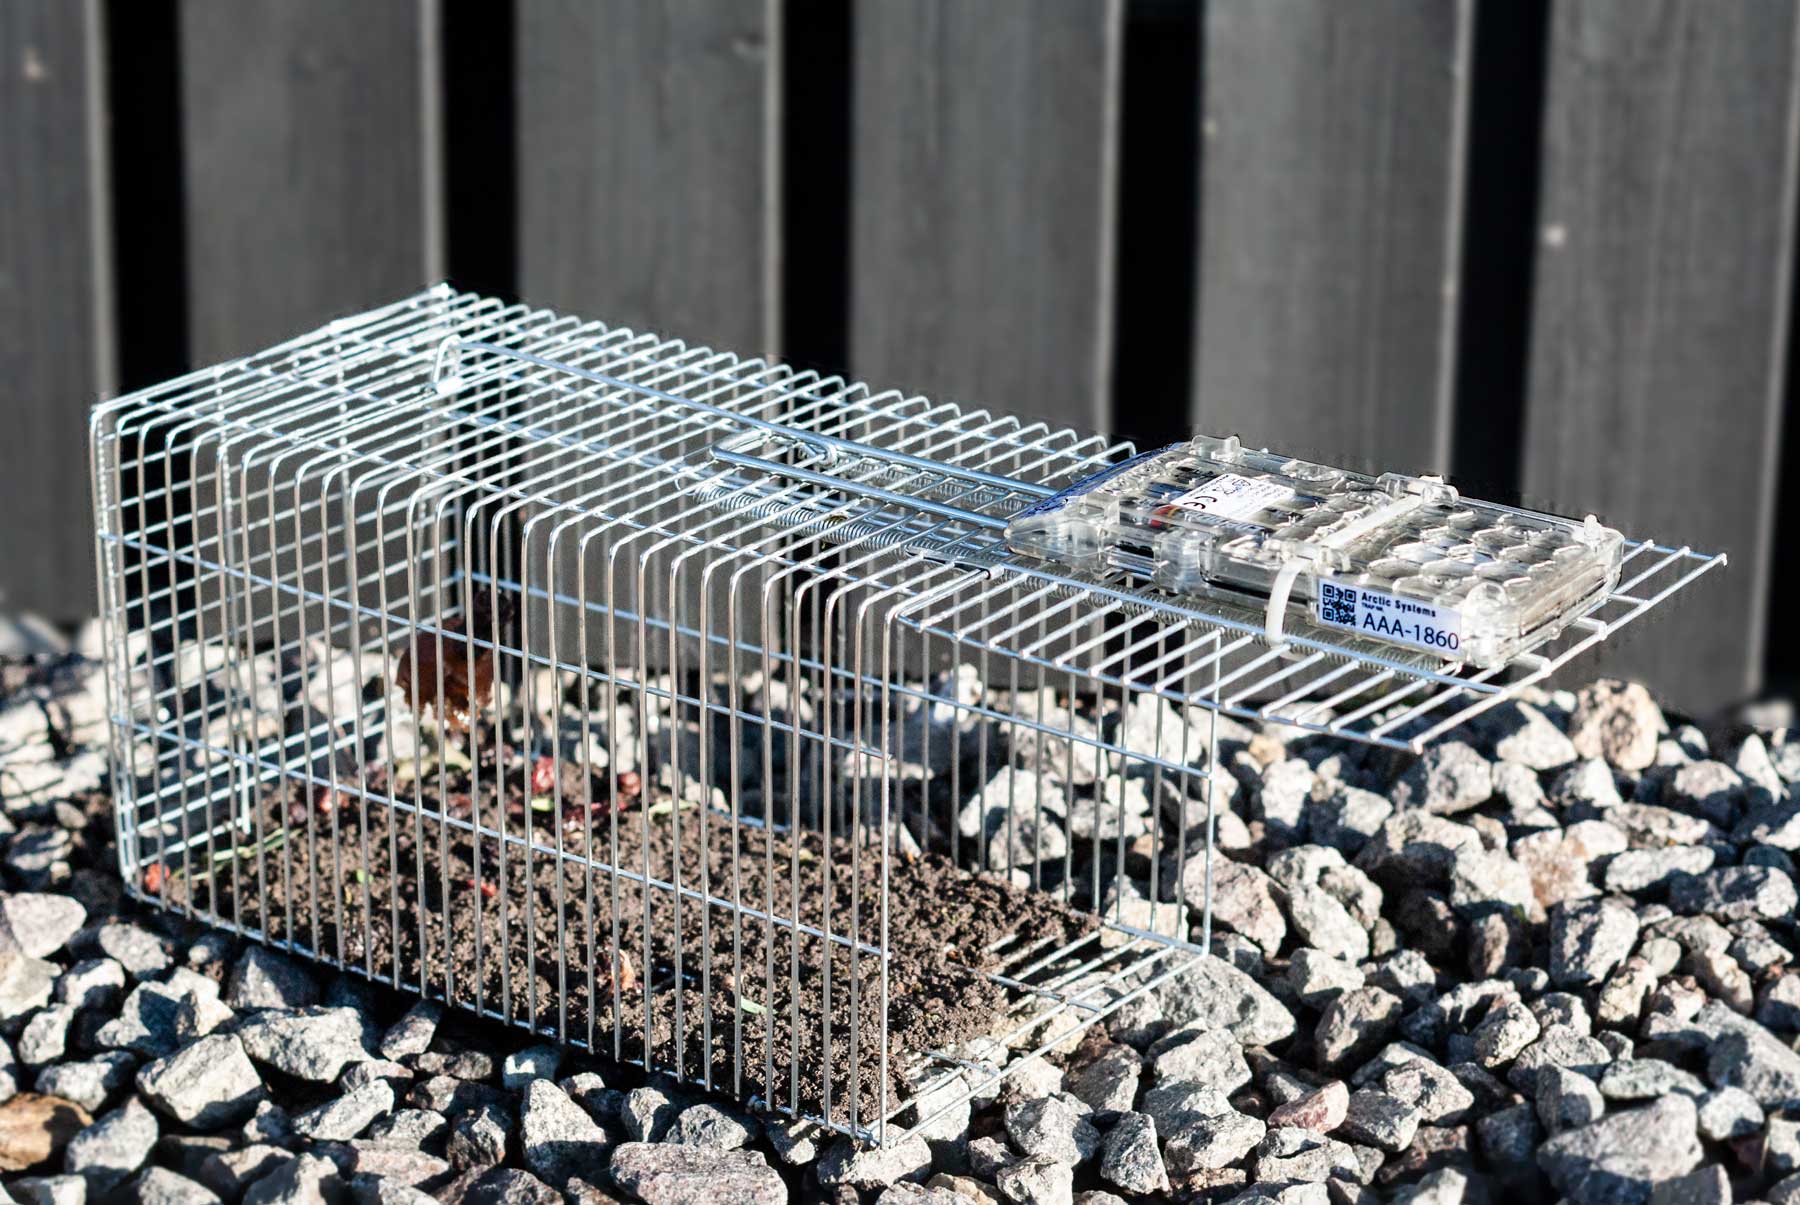
In cases where traps feature heavier falling shutters, the RATMO® can sense the impact of the closing motion transmitted through the cage as the door descends.